Homeowners need to realize that contractors or insurance adjusters are not going to do all the work for you. The “sit around and think everything is going to be perfect and done correctly approach” really doesn’t work and has never worked — trust me.
Half the time contractors don’t even know what the building codes are. Maybe a slight exaggeration, but it’s a lot. The same goes for insurance adjusters. There is nothing wrong with not adding building codes to your claim at first — adjusters can’t possibly know every building code out there.
But here’s the thing: Do you even know if every building code that is needed to rebuild your property is even included, or do you even have building code coverage?
Let’s discuss.
What You Need to Know — The Coverage
- What Ordinance or Law coverage is — Also known as “building code coverage,” it covers building items that are affected or need to be updated based on the approved building codes in your area.
- How to find out if you even have this coverage — The easiest way is to call your agent. Second is to look at the policy. If you can find it on the policy, have the agent show you where it is.
- Why won’t your adjuster tell you? It’s unlikely that an adjuster would know every building code in every area. They’re not a contractor, so building codes are often missed or left off claims.
- What code upgrades get triggered in Oklahoma — Most common are ventilation — roof vents and soffit vents — chimney flashing, drip edge, ice and water shield in the valleys and decking upgrades.
- What those upgrades can cost you out of pocket — Building codes that need to be addressed could simply be $500-$1,000 to start, or well within the $5,000-$10,000 range if decking needs to be fully overhauled combined with everything else.
What You Can Do About It — The Homeowner Action List
- Confirm you have Ordinance or Law coverage and where it is in your policy
- After the adjuster visit — confirm what was and wasn’t added to your claim
- Take photos of your house before meeting with your contractor
- Review the final insurance estimate before work starts
- Build the roof and confirm the work matches what was approved
If Insurance Is Paying — Don’t Go the Cheap Route
One thing I tell homeowners is that if the insurance company is paying for the roof, you don’t have to go the cheap route. Think about it — if the building codes are paid for and you finally address the ventilation in the attic; your roof could last 5 years longer. What if the roof can withstand wind damage better or survive a hailstorm and you don’t have to file another claim? That seems like a better win for you and the insurance company.
Now if you decide not to pay your deductible, or your contractor willingly agrees to pay it, then you have officially decided to go the cheap route.
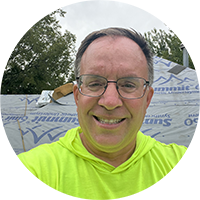
New OSB decking, drip edge, and underlayment — three code-required items that get missed all the time when a contractor does not supplement properly.
Step 1 — Confirm You Have Ordinance or Law Coverage
Confirm you have Ordinance or Law coverage and where it is in your policy specifically. If your agent doesn’t know what that is, you need to speak to a manager — or consider switching to another insurance agency.
Being prepared is where you want to be. If your insurance agent says you have it, then ask them specifically where it is. This is important–confirm you have it and see it with your own eyes.
Two Quick Examples.
The first was a potential customer whose roof was getting old. She had the old cedar shake shingle with a layer of shingles on top — lots of updates needed. It was almost time to get a new roof, but we mentioned confirming the building code coverage first. Her agent said that if the roof was built before 1976, she didn’t need the coverage.
That’s wrong. Even a newly built house should have building code coverage. Without it, anything related to building codes will be denied. It is practically impossible to know if everything was done to code when a house was newly built. Today’s homes are still built without conforming to 1/300 rule per code for a balanced ventilation system.
The second example — we asked the homeowner to confirm if she had building code/law or ordinance coverage. She called her agent and they said they didn’t know what that was. We know personally many agents aren’t familiar with it, so we proceeded as normal with the claim.
The homeowner had quite a bit of wind damage — mostly on the front but some on the back. Through woven valley systems on the front, we were able to get the full front replaced instead of just a repair. The back had less damage, but because of how the underlayment needs to overlap at the top, the back should have been paid for as well. It was denied because of missing building code coverage. Front replaced, back denied. Half a roof installed.
In both cases, the insurance agents failed to understand how building code coverage affects claims.
Step 2 — After the Adjuster Visit
You’ve confirmed you have the coverage and know where it is in the policy. From there, a conversation with the adjuster is good to confirm on their end that the building code coverage is in place.
Just an example, but let’s say the adjuster says you don’t have the building code coverage. You check beforehand and know where it is in your policy. From there both of you can double check the policy, and it’s a quick fix.
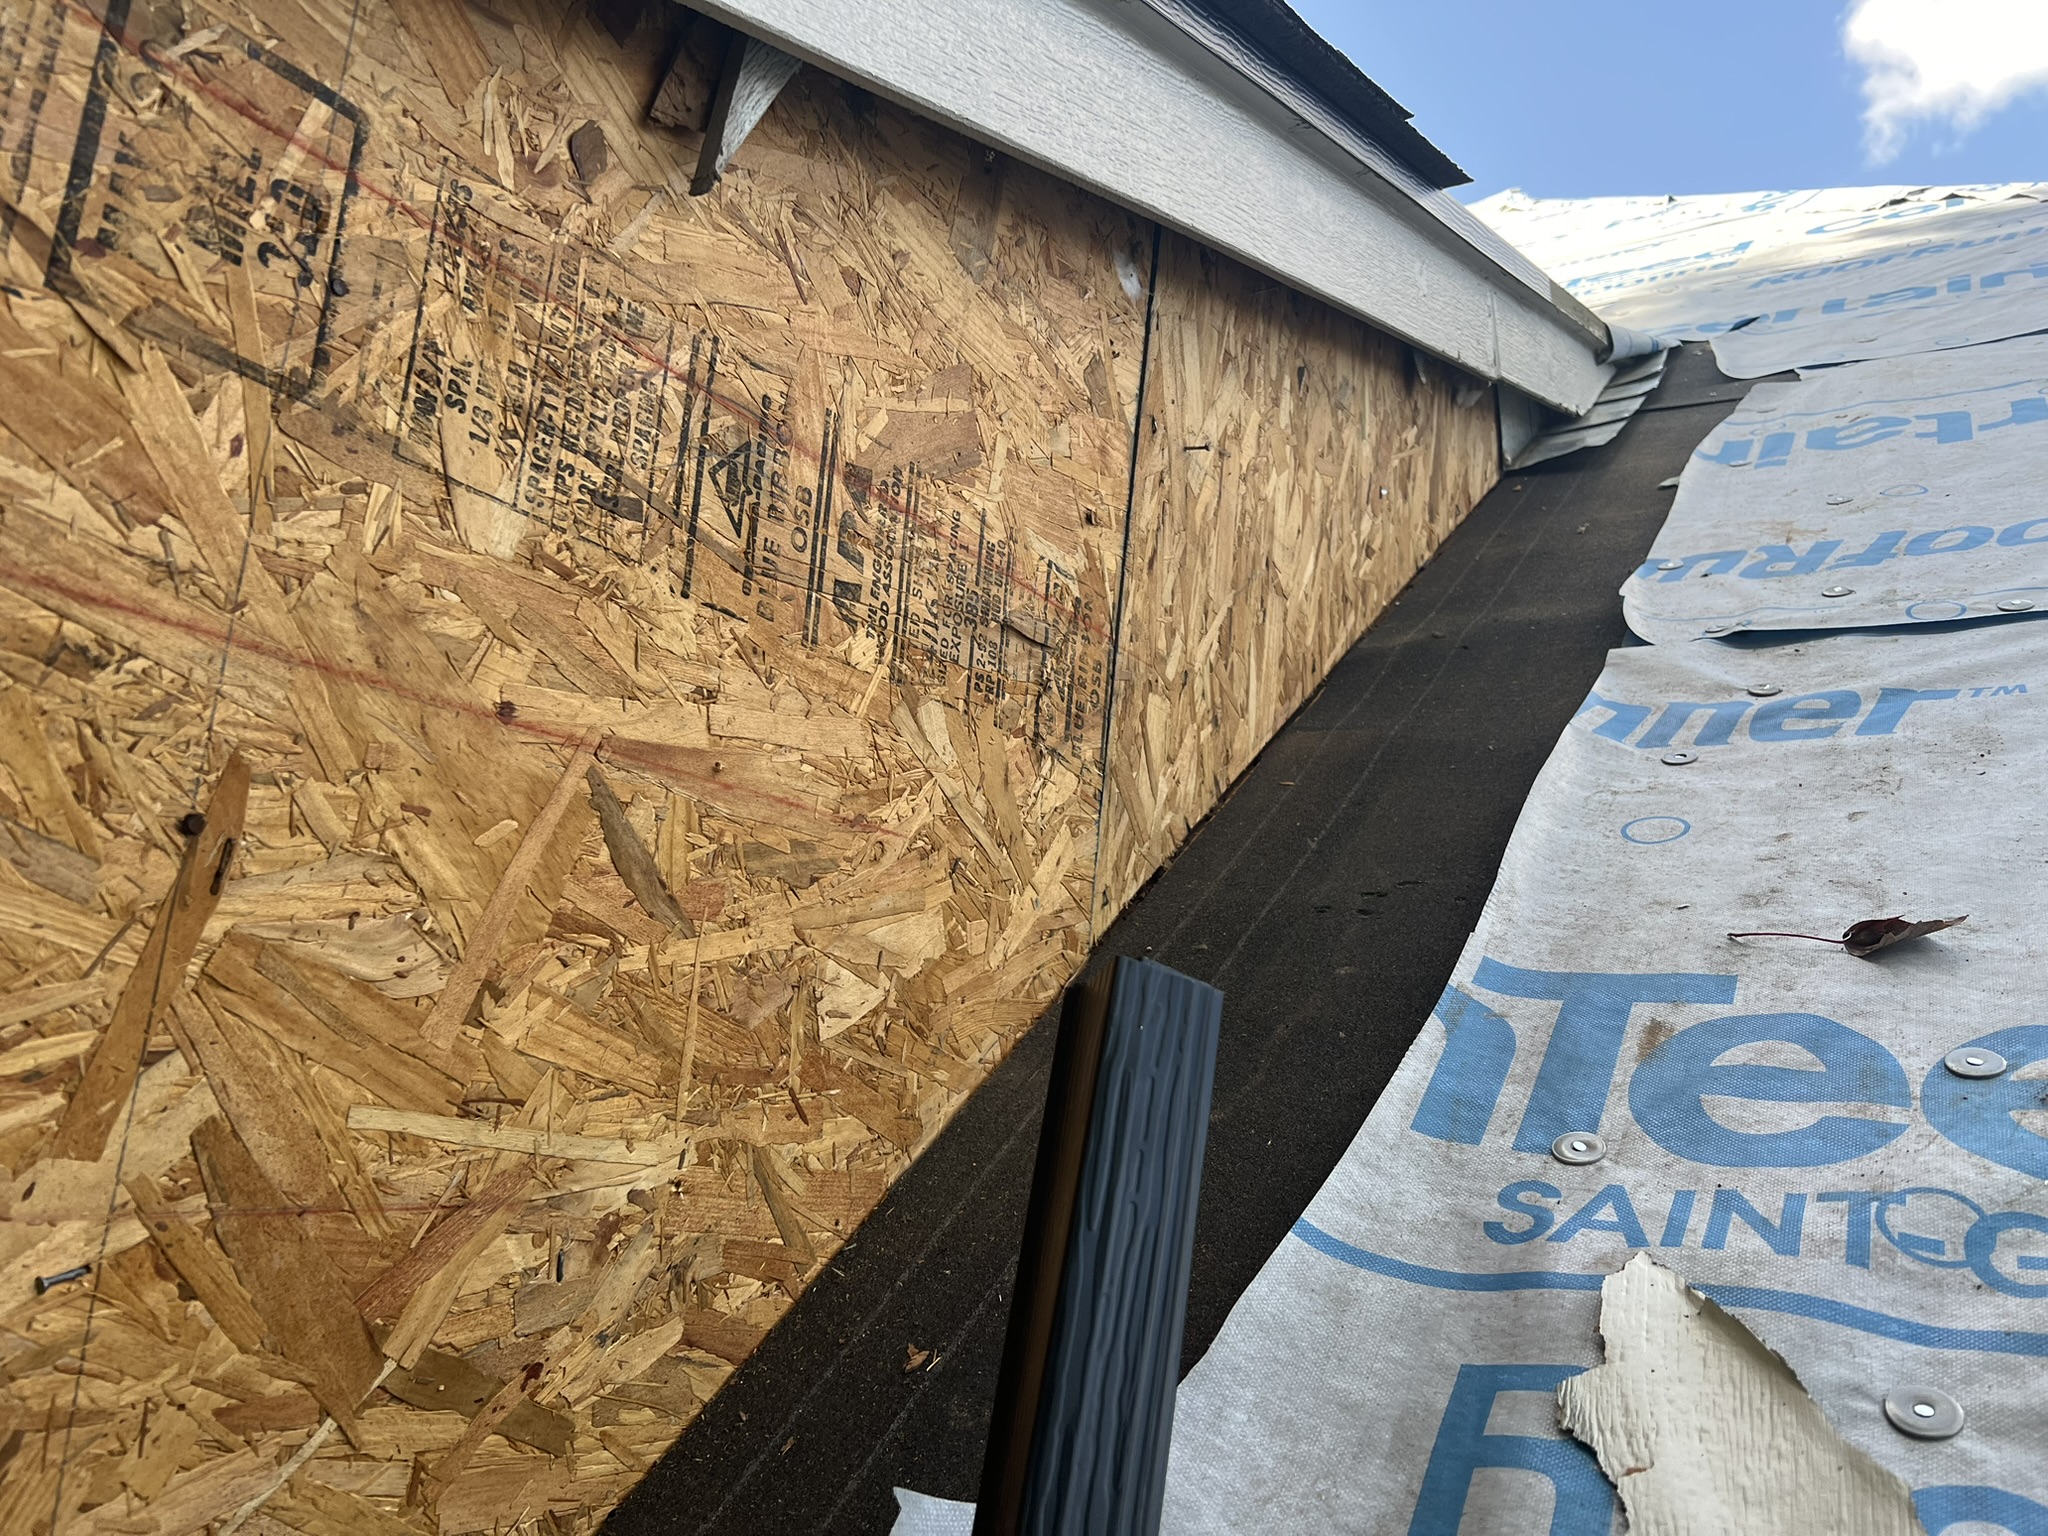
Step flashing at a dormer wall — this is a code item. If your contractor is not replacing it and your adjuster did not add it to the estimate, you are paying for it out of pocket.
From there the conversation could be: “Hey, did you get all the building code coverage items included?” He might say something like: “I know ice and water shield is code, so I will add it.” But, he also might say, “Contact a contractor regarding other items that need to be added and just let me know.”
Overall, a nice easy conversation but only if you know what the coverage is and if you have it.
Step 3 — Take Photos Before Meeting Your Contractor
This part is critical. More than likely you are not going to get on the roof — so how do you communicate about all areas of the roof and if there are building code issue? Taking pictures is the answer. What should you photograph? Every chimney on the roof, all pipes that come through the roof, and every problem area you’ve ever had in that house.
What we are trying to achieve is a real conversation — compared to contractors just showing up doing their 30-minute sales pitch and getting you to sign paperwork. When you have photos, the conversation changes. Here is my chimney — is it up to code? What improvements are needed? Is it on the insurance paperwork? The conversation just gets better.
Pro Tip: Guaranteed the conversation could change if you had photos for you and the contractor to look at. Some contractors may have photos, but are they on a phone for you to look or make comments on?
Step 4 — Review the Final Insurance Estimate Before Work Starts
Once you have an idea of what code-related items are needed on the roof, the process of reconciling them is necessary. This is called the supplementation process — it’s an avenue insurance companies use for anyone to submit additional documentation like building codes or photos.
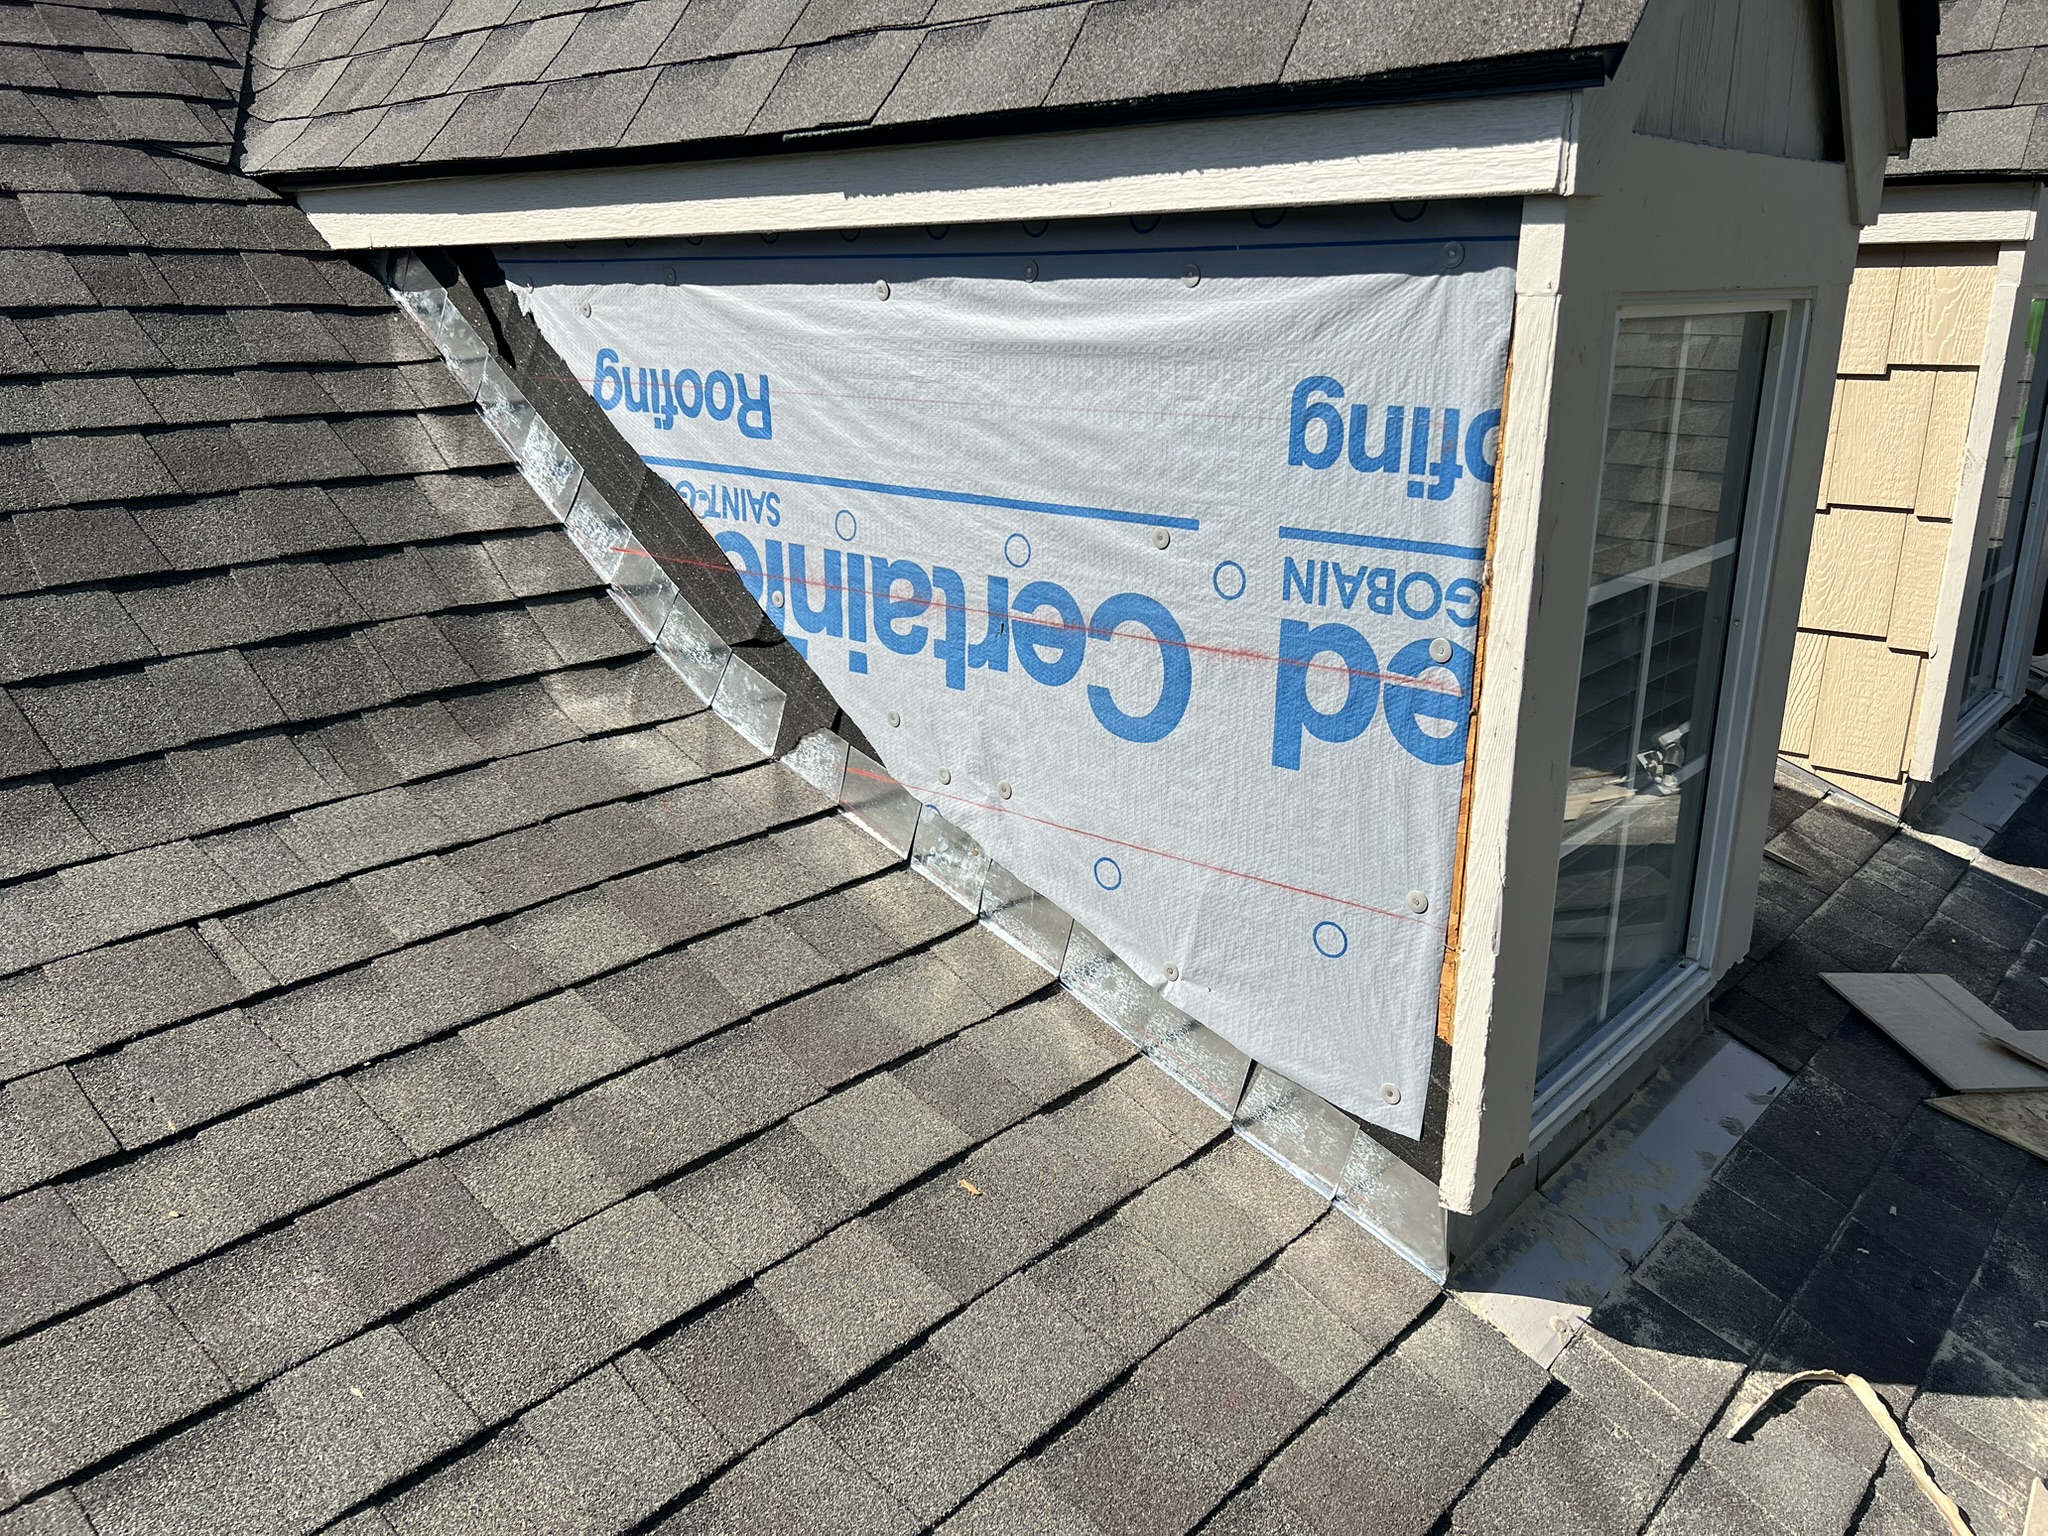
A full roof in progress — crew, ice and water shield in the valley, decking staged. This is what a job that is being properly supervised looks like from above.
This process needs to happen to get anything building-code related added to the claim that is not already on the estimate. This is what I mean about not going the cheap route. If the building codes are not on the estimate, it is likely the contractor will not install or upgrade any item that the insurance didn’t pay for. More than likely the conversation will be that the insurance never paid for it. If you have a contractor that knows all the building codes and gets them added to the estimate, then you get a better roof.
Here’s a real example:
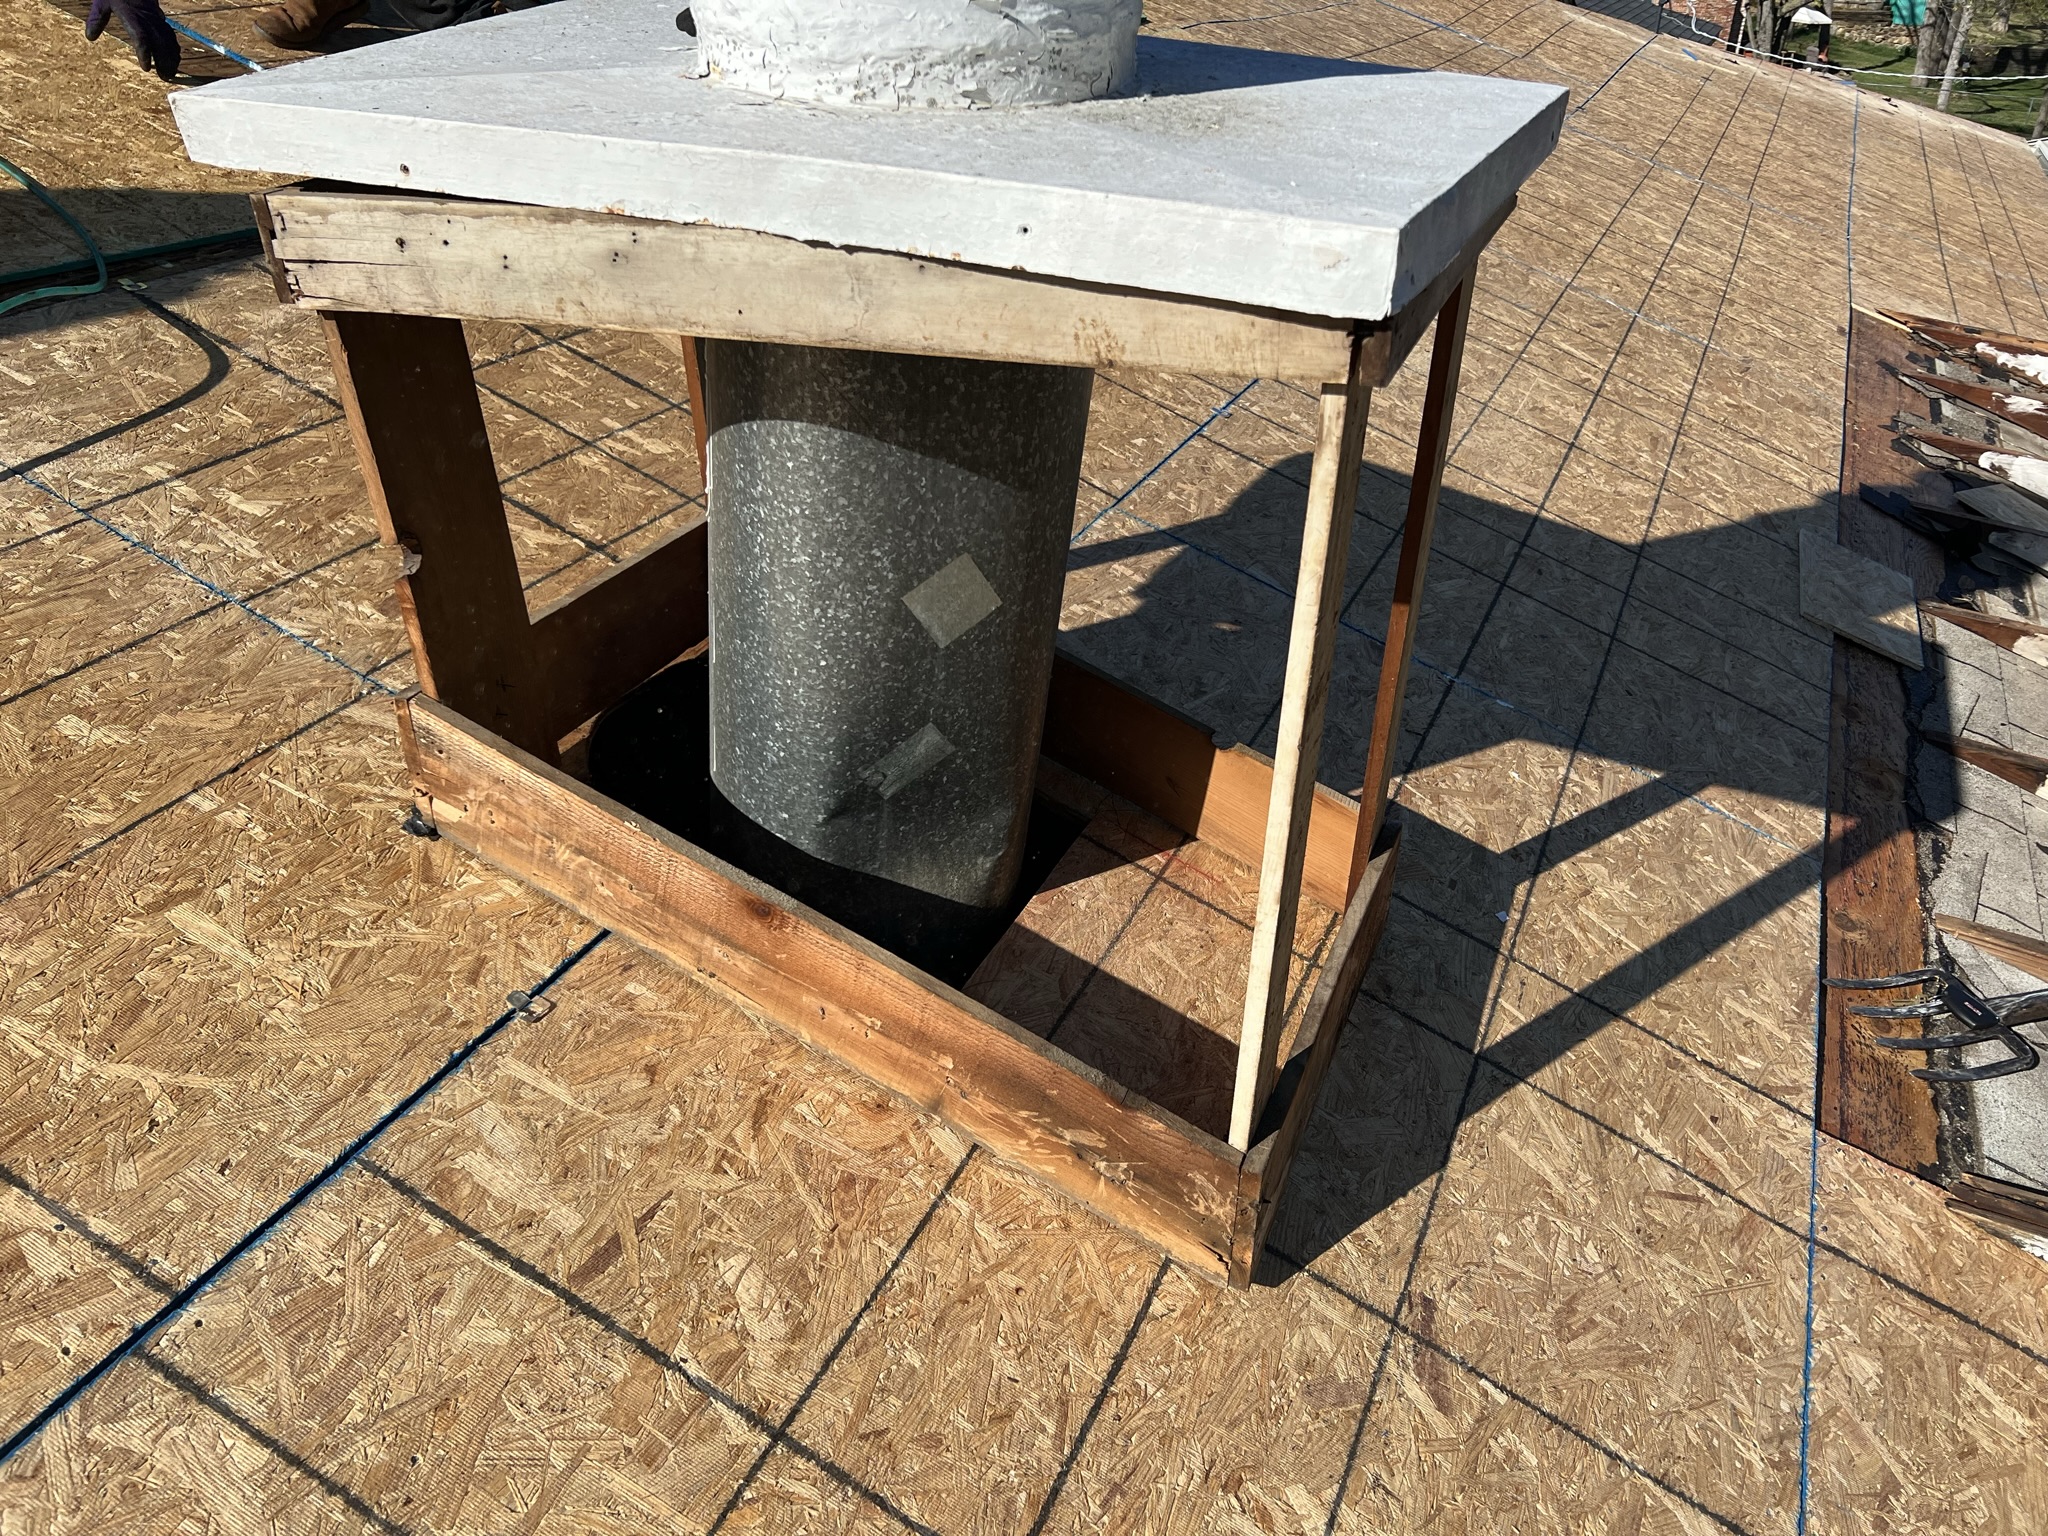
A chimney chase torn down to the base during a replacement — chimney flashing upgrades are a building code item and one of the most frequently missed line items on insurance estimates.
Quick note on how the deductible works — most homeowners think insurance covers the full approved amount. It doesn’t. If your claim is approved for $15,000 and your deductible is $3,000, insurance sends you a $12,000 check. You pay the contractor the remaining $3,000. That’s how it works. The deductible is always your responsibility.
Both roof jobs are $15,000.
In Option 1 you pay no deductible. In Option 2 you pay your deductible. Keep that in mind as you read.
Contractor 1 covers your $3,000 deductible. He does not supplement building code items. You pay zero out of pocket and get a $12,000 roof — a roof that could be leaking in 5 years or have shingles blowing off sooner than you’d like because it cheap.
Pro Tip: Insurance doesn’t always pay top dollar. $15,000 could be low for some contractors based upon their overhead. When a contractor doesn’t collect your $3,000 deductible, he’s forced to do the work for $12,000. This is where storm chasers come in. It’s not about quality — it’s about quantity. The more roofs he builds, the more money he makes.
Contractor 2 supplements for building codes. Your insurance company adds $3,000 to the claim and you pay your $3,000 deductible. The total job is $18,000 — and that includes updated ventilation, drip edge, better materials, and potentially a full lifetime warranty.
Pro Tip: Contractor 2 takes the time to make sure building codes are added to the claim. Insurance approves ventilation upgrades, drip edge, and new chimney flashing. Are you getting a better roof? Yes, you are. The question is — do you want the $12,000 roof for free, or do you want the $18,000 roof for $3,000?
What do you think is going to happen between those two roofs?
Step 5 — Build the Roof and Confirm the Work
You’ve worked hard to get here. Don’t let all that time and energy go to waste. I always say — I can work a claim for a month, and the job itself only takes 1-2 days to install. You’ve worked on this for a month. The work gets done in 8 to 10 hours. Be there for it if you can.
Quick note roofing contractors aren’t used to homeowners being part of the process. Most of the time no one is around. That’s exactly why things aren’t always done correctly. You being present changes that.
Here’s how to confirm the work step by step:
- Have all building code items listed or highlighted on the estimate before the crew arrives.
- Identify each code item and when it gets installed. New decking, for example, means everything gets torn off first — shingles, felt paper, flashing. Once you see it all stripped, that’s your checkpoint. Every piece of roofing material should be removed before any new decking goes on.
- Ask questions and check materials. Getting new vents? Confirm the brand matches what was approved and the quantity is right. It’s okay to watch. Everyone might be a little nervous — that’s okay. You’re the homeowner who wants a quality job.
- Check everything off your list until it’s all done. Don’t be like — two things left, they’ll be fine, I’m going to go eat. If something is missing or done wrong, it’s a lot cheaper to fix while the crew is still on the roof than after they’ve packed up and left.
- Confirm all work with the project manager before they leave. Hopefully someone was there to inspect throughout the day. Most warranties run from 5 to 10 years — after that you’re on your own. Getting it right now saves you problems down the road.
Can’t take the day off? No problem. Photos — and lots of them — being sent to your phone or email can help you confirm the work is getting done right. Check in on a lunch break. Call if something looks off.
Pro Tip: Building codes are in the details. The details are what prevent leaks and problems down the road. Don’t skimp or assume they are getting done.
The Bottom Line
You’ve worked hard to get through the claim process. Don’t let the last step be the one that costs you. Know your coverage, ask the right questions, and be present on the day of the job.
If you have questions about building code upgrades on your roof, that’s what we’re here for. Green Country Roofing 918-607-7409.